Prosthetics - Snap Moulds, part 1! Plaster core and silicone mould
Snap moulds (also called conformed moulds, contoured moulds or squash moulds) are used to create a 3D prosthetic. They consist of a negative mould of the sculpt/piece, and a positive life cast that squash together. They can be made out of plaster, however these can easily break and chip, so a polyurethane mould will be created. Polyurethane is also lighter and more resistant than plaster, although it can be costly.
As said by Todd Debreceni, "conforming moulds are becoming more commonly used in prosthetic application due to the ease and precision of the application process". (Debreceni, T. 2019). He goes on to say that this type of mould may not be suitable for all appliances, but he recommends them for smaller pieces.
As these are used to create individual prosthetics, they only need to be around the size of that piece. For example, if a nose prosthetic is being created, the mould only needs to be of the nose. This is accomplished in the first step using the master mould. A clay wall is built around the desired area, which is then filled with plaster to create a core.
 |
| Figure 1 - Clay wall to create desired core size (Dobson, E. 2021) |
 |
| Figure 2 - Creating core with plaster (Dobson, E. 2021) |
For the student's design, there will be three individual pieces, therefore three plaster cores were made for this. Similarly to the master mould, these cores will be corrected with buff clay prior to being moulded in silicone. The purpose of this is to create a mould that will be used to create the polyurethane positive for the squash mould.
 |
| Figure 3 - Core of left eye (Brown, J. 2020) |
 |
| Figure 4 - Core of right eye (Brown, J. 2020) |
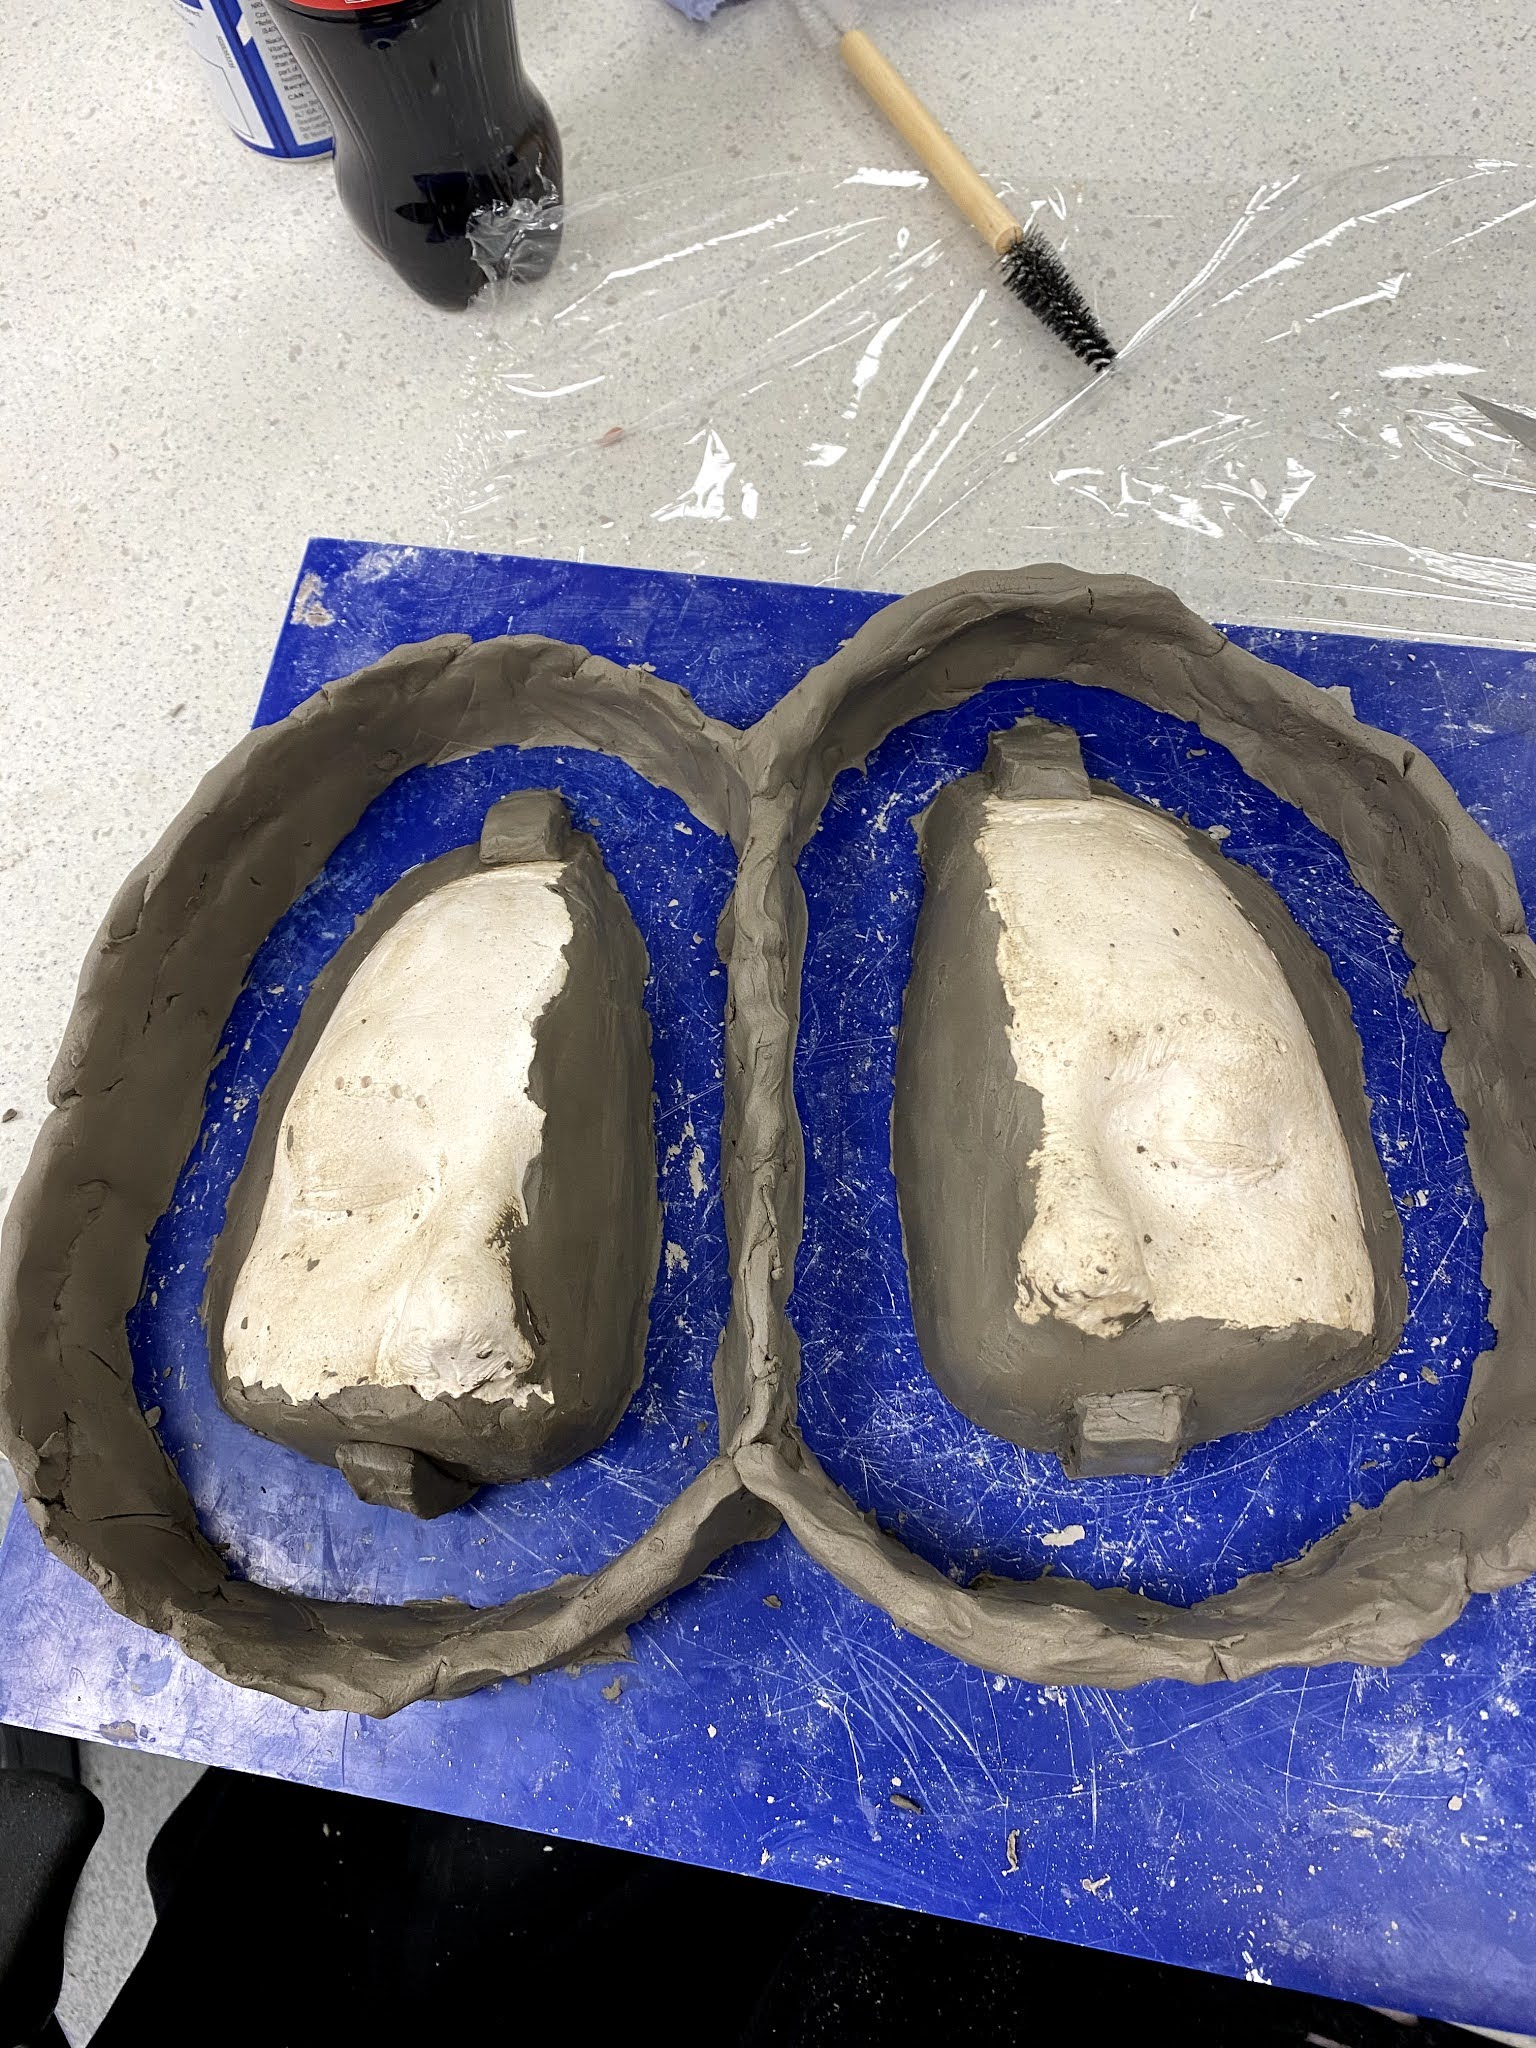 |
| Figure 5 - Two plaster cores prepped for moulding (Brown, J. 2020) |
Keys are again added so that the two parts of the squash mould will connect properly later on. This is then sprayed with Eject-It spray and moulded in Platsil gel 20 silicone.
 |
| Figure 6 - Cores being moulded (Brown, J. 2020) |
 |
| Figure 7 - Core being moulded (Brown, J. 2020) |
This was done in three layers, with each layer being around 100g (50g of part A and part B). Two further layers were added on top with the poly fibre added to give extra support and ensure the silicone is thick enough.
 |
| Figure 8 - Poly fibre layer (Brown, J. 2020) |
 |
| Figure 9 - Poly fibre layer (Brown, J. 2020) |
 |
| Figure 10 - Poly fibre layer (Brown, J. 2020) |
The poly fibre layer on the core for the mouth clearly doesn't have enough poly fibre mixed in, so it isn't quite the right consistency. However it did still add some thickness to the area, this is something the artist needs to be mindful of in the future.
Once the silicone is set, the final part of this stage is to create a supporting jacket. This was made out of plaster. Plaster was used as they are only small moulds, so they do not require a jacket like fibre glass. This also shows different ways to create jackets for moulds. Plaster could have been used for the master mould as this would reduce the cost and eliminate exposure to harmful chemicals. However, with the size of the master mould, using plaster would have made it extremely heavy and prone to breaking.
 |
| Figure 11 - Plaster jacket (Brown, J. 2020) |
 |
| Figure 12 - Plaster jacket (Brown, J. 2020) |
The silicone mould can now be cleaned up and any excess silicone removed (for example, the keys can be neatened up as there is some overhang there) and it is now ready for the next step which is polyurethane.
-Jess
References:
- Debreceni, T. (2019) Special makeup effects for stage and screen: Making and applying prosthetics. 3rd ed. Abingdon, Routledge.
Bibliography:
- How to create a urethane resin makeup prosthetic mould. (no date) Available from https://www.smooth-on.com/tutorials/creating-makeup-prosthetic-mold-shell-shock-plasti-paste/ [Accessed 20/01/2021].
- Streeton, J. (2014) Neil Gorton, the art of silicone prosthetics. Part three: conforming moulds for 3D silicone transfer. Available from https://jackstreetonsp.wordpress.com/2014/10/20/neill-gorton-the-art-of-silicone-prosthetics-part-3-conforming-moulds-for-3d-silicone-transfer/ [Accessed 20/01/2021].
- Streeton, J. (2014) Types of moulds and moulding materials. Available from https://jackstreetonsp.wordpress.com/2014/12/16/types-of-moulds-and-moulding-materials/ [Accessed 20/01/2021].
Figures:
- Figure 1, 2 - Dobson, E. (2021) 1) Prosthetics: 1st stage of making snap core. Available from https://www.youtube.com/watch?v=5ERtxKfkenQ&list=PLK6sSjvE7bG0B0WgWiBzuS7F85YKoXAVZ&index=2&t=16s&ab_channel=YorkCollegeHair%2CBeautyandHolisticTherapies [Accessed 26/01/2021].
- Figure 3, 4, 5, 6, 7, 8, 9, 10, 11, 12 - Brown, J. (2020) York College.
Comments
Post a Comment