After creating the master mould, the life cast can be used to begin sculpting. The sculpting process is the most important step when creating prosthetics. The sculpt is what the final prosthetic will look like, so attention to detail is key here.
To prepare the cast, it can be painted the same colour as the sculpting clay that will be used. This is helpful because it allows the sculpt to blend in with the cast and not look so odd, but it also helps the cast and clay to be seen as one uniform piece.
 |
| Figure 1 - Painted ear casts (Brown, J. 2020) |
Once this has dried, it is important to make sure a separator has been applied over the top. When the basic sculpt has been finished, the clay will be floated off of the cast in water and transferred to the smaller cores. The separator is necessary to do this. |
| Figure 2 - Separator for floating off sculpts (Neillsmaterials, no date) |
For this sculpt, Chavant NSP was used. This clay is a very popular choice as it is non-hardening and doesn't dry out like water-based clays. It can also hold a great level of detail. (Bray, S. 2011).The original design for this brief was a pumpkin design. The idea was that the pumpkin details had been cut into the skin, so this was starting to be planned out.
 |
| Figure 3 - Beginning of sculpting process (Brown, J. 2020) |
 |
| Figure 4 - Sculpting process (Brown, J. 2020) |
 |
| Figure 5 - Sculpting process (Brown, J. 2020) |
The sculpt did change a couple of times while the details were being figured out. Although, it never really looked quite right. This could have been because a reference wasn't being used, which is very important when trying to recreate something. Especially with the body.
 |
| Figure 6 - Sculpting process (Brown, J. 2021) |
After re-sculpting a few times, the design ended up being changed. Rather than the details being cut into the skin, it would now be a human-pumpkin hybrid. This started to work a lot better as the image of what this would look like was a lot clearer. The area was blocked off using small blobs of clay to create a base layer. This was then built on top of.
 |
| Figure 7 - New design sculpt (Brown, J. 2021) |
 |
| Figure 8 - New design sculpt (Brown, J. 2021) |
As the sculpt would be floated off, fine details and edges shouldn't be done until it has been transferred, as the floating process could ruin these.
 |
| Figure 9 - Floating the sculpt (Brown, J. 2021) |
Once the sculpt has been released from the cast, it can be transferred to the core. White spirit was used to thin down the edges, as well as to create a slurry to add texture inside the mouth piece.
 |
| Figure 10 - Pumpkin texture (Solidstarts, no date) |
 |
| Figure 11 - The sculpt on the core (Brown, J. 2021) |
 |
| Figure 12 - The sculpt on the core (Brown, J. 2021) |
 |
| Figure 13 - The sculpt on the core (Brown, J. 2021) |
The eye sculpts took a little while to perfect. They were sculpted and re-sculpted many times, but an end result was eventually achieved.
 |
| Figure 14 - Eye sculpt on core (Brown, J. 2021) |
 |
| Figure 15 - Eye sculpt on core (Brown, J. 2021) |
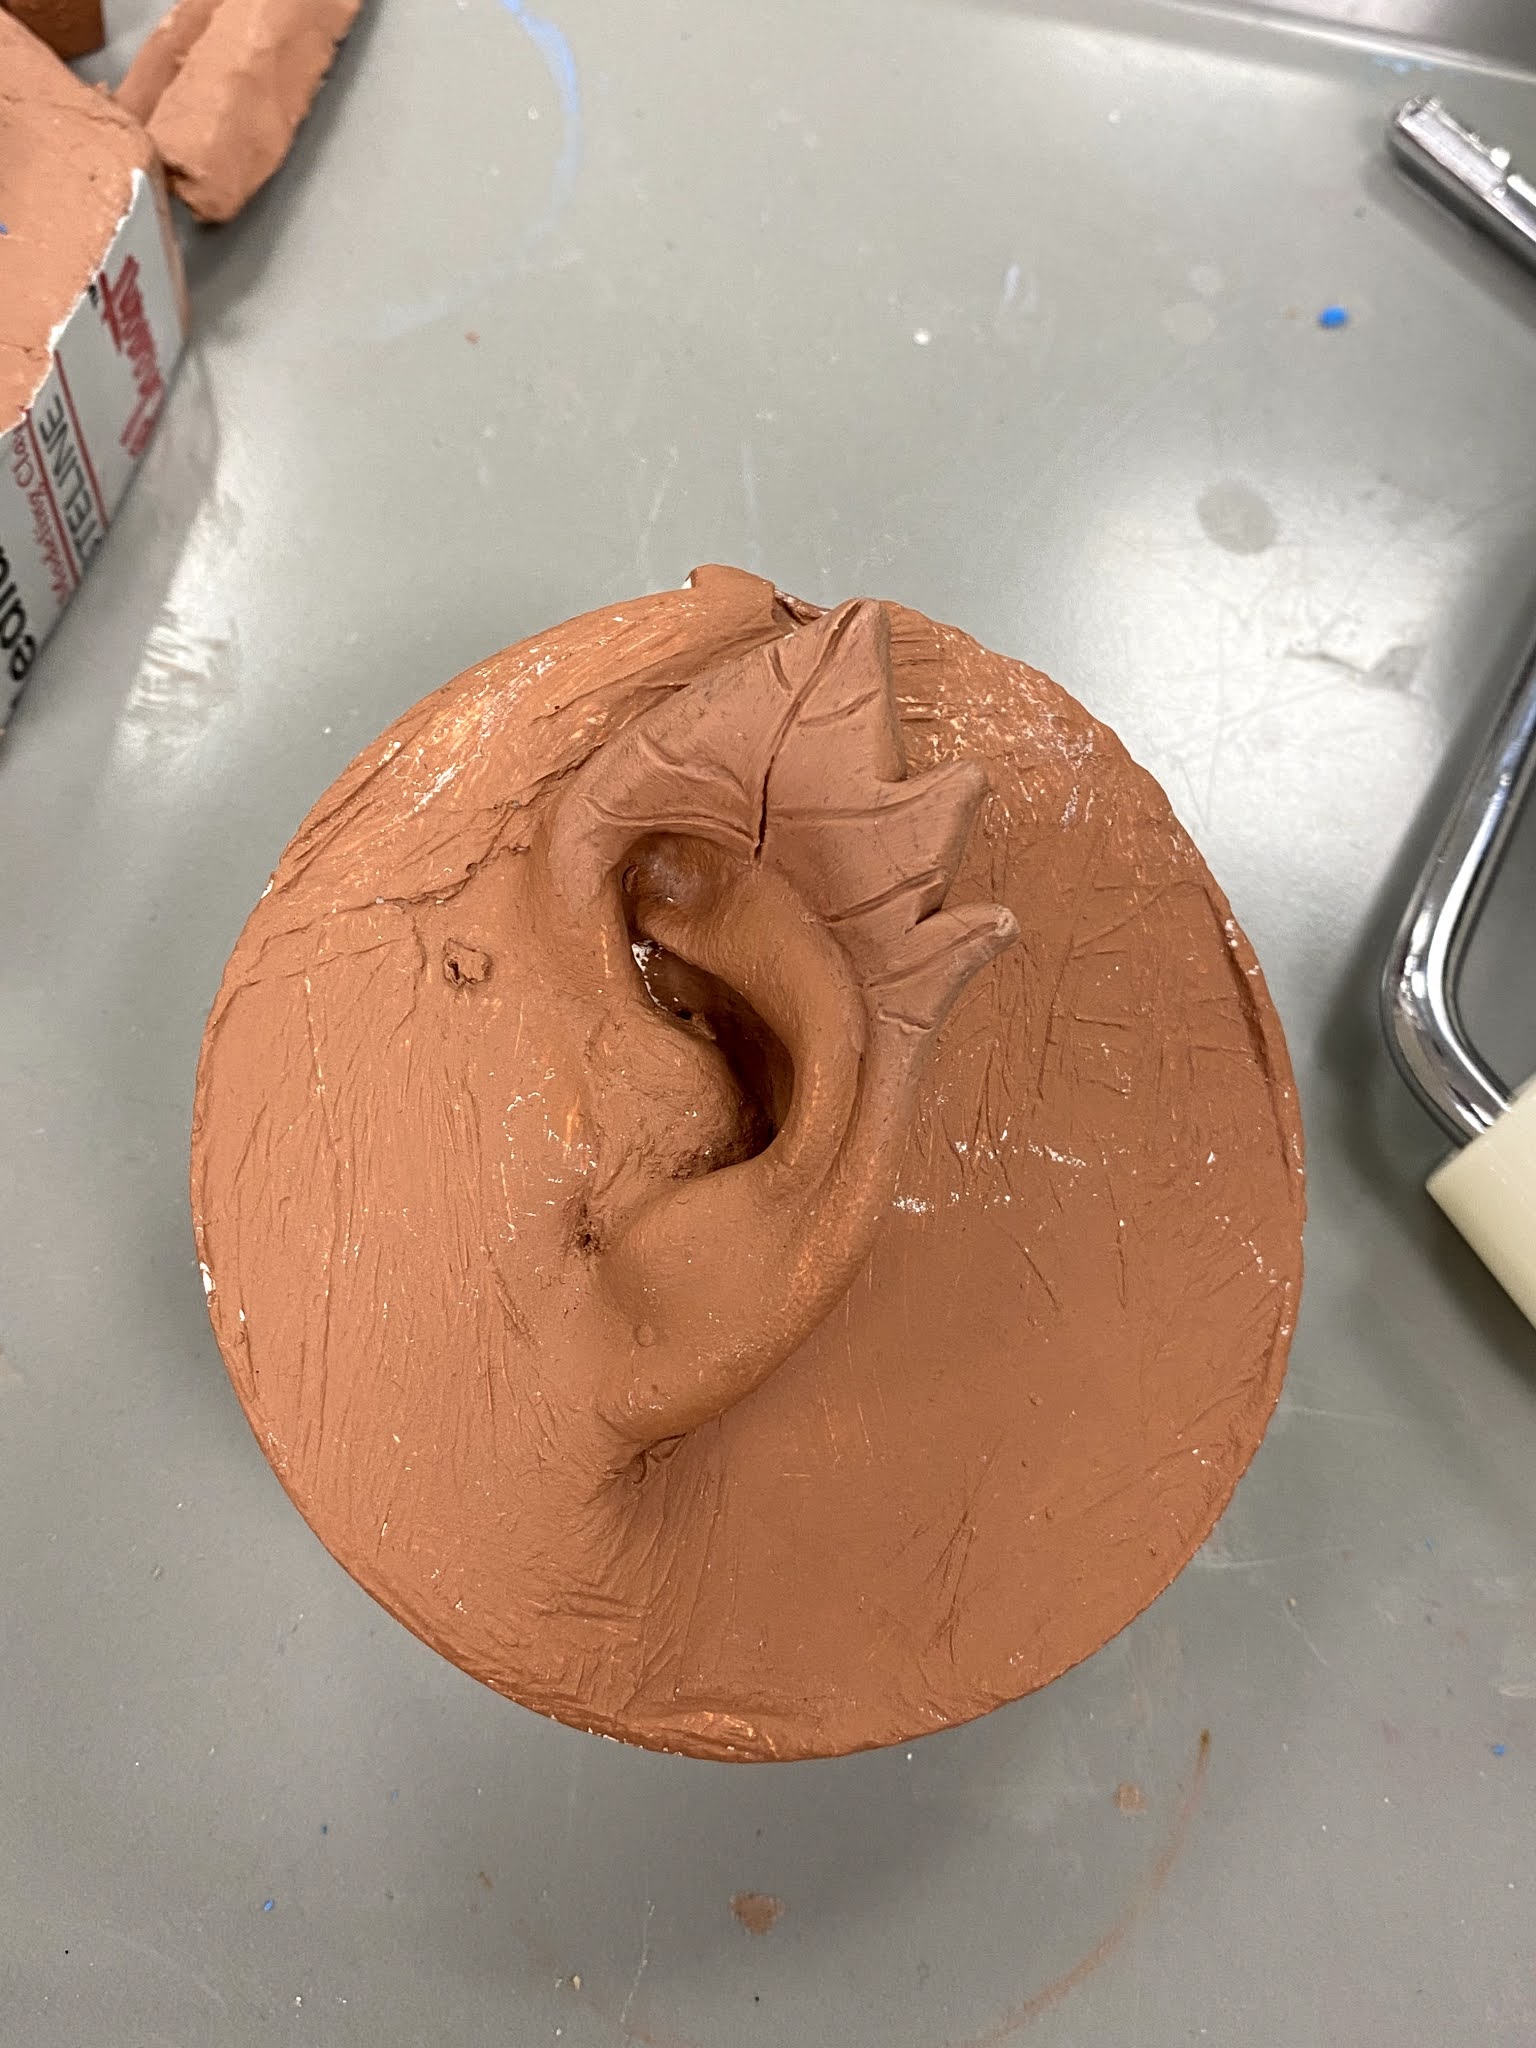
These are now ready for moulding.For the ears, a fairly simple sculpt was done. The goal was to create leaf details to add to the pumpkin design. This was built up slowly using the Chavant NSP clay.
 |
| Figure 16 - Ear sculpt (Brown, J. 2021) |
As these were so simple, it was decided that they would be made into latex ears. To mould them, buff clay was used to build a wall around the sculpt and cover any part of the cast/plaster that was showing. The mould only needed to be of the sculpt itself.
 |
| Figure 17 - Moulding the ear sculpt (Brown, J. 2021) |
 |
| Figure 18 - Moulding the ear sculpt (Brown, J. 2021) |
Eject-it spray was used as a release agent before plaster was poured in to mould the sculpt.
 |
| Figure 19 - Moulding ear sculpt (Brown, J. 2021) |
 |
| Figure 20 - Moulded ear sculpt (Brown, J. 2021) |
The last sculpt was a flat mould. This was to add some extra details to the design, to give the appearance of damaged pumpkin skin.
 |
| Figure 21 - Textured/damaged pumpkin (Gettyimages, no date) |
 |
| Figure 22 - Flat mould sculpt (Brown, J. 2021) |
This is then moulded in silicone, creating a flat mould.
 |
| Figure 23 - Moulding sculpt (Brown, J. 2021) |
-Jess
References:
- Bray, S. (2011) Prosthetic sculpting basics. Available from http://www.learnmakeupeffects.com/prosthetic-sculpting-basics/ [Accessed 26/02/2021].
Bibliography:
- Bray, S. (2016) Floating pieces. Available from http://www.learnmakeupeffects.com/floating-pieces/ [Accessed 26/02/2021].
- Chavant NSP. (no date) Available from https://www.neillsmaterials.co.uk/product/chavant-nsp/ [Accessed 26/02/2021].
- Sculpting 101 for makeup effects artists. (no date) Available from https://newtomakeupeffects.com/sculpting-101/ [Accessed 26/02/2021].
Figures:
- Figure 1 - Brown, J. (2020) York College.
- Figure 2 - Separator. (no date) Available from https://www.neillsmaterials.co.uk/product/separator/ [Accessed 26/02/2021].
- Figure 3 - Brown, J. (2020) Leeds.
- Figure 4, 5 - Brown, J. (2020) York College.
- Figure 6, 7, 8, 9 - Brown, J. (2021) Leeds.
- Figure 10 - Pumpkin. (no date) Available from https://solidstarts.com/foods/pumpkin/ [Accessed 26/02/2021].
- Figure 11, 12, 13, 14, 15, 16, 17, 18, 19, 20 - Brown, J. (2021) York College.
- Figure 21 - (no date) Available from https://www.gettyimages.ca/detail/news-photo/damaged-pumpkin-which-was-hit-by-hailstones-after-a-freak-news-photo/489394160 [Accessed 26/02/2021].
- Figure 22, 23 - Brown, J. (2021) York College.


Comments
Post a Comment