Prosthetics - Snap Moulds, part 3! Moulding the sculpt
Now that the sculpts have been transferred to the polyurethane cores and finished, it is time to make the second part to the snap mould.
 |
| Figure 1 - Finished sculpt (Brown, J. 2021) |
The first stage is to cover the core in a layer of plasticine, excluding the keys. This is so the keys and recessed keys that will be made in the mould will fit together properly. A 1cm gap should be left between the plasticine and the sculpt, as this will be the cutting edge when the prosthetic is made. The plasticine was run through a pasta maker so that it was all the same thickness. This must be perfectly smooth with no gaps as this will show in the mould. Creating the cutting edge is very important as "if your cutting edge is too wide, you'll get a thick edge because not enough silicone will be pushed out of the way. If your cutting edge is too thin, the edge of the appliance becomes too difficult to distinguish." (Debreceni, T. 2019).
A clay moat/flange and wall is then made around the sculpt which will collect the polyurethane that will be poured over. The moat "will define the area of the conforming mold" (Debreceni, T. 2019) meaning that this is how big the mould will be, and the moat is how thick the walls around the sculpt will be. It is important that this has a good thickness to it as it will prevent any damage happening to the mould when the two pieces are separated. This needs to be level all the way around as "silicone for the appliance will need to pool in the centre". (Debreceni, T. 2019).
 |
| Figure 2 - Finished sculpts with plasticine layer and clay wall (Brown, J. 2020) |
 |
| Figure 3 - Finished sculpt with plasticine layer and clay wall (Brown, J. 2020) |
After this, a suitable release agent (such as 'Macwax' which is a high quality spray release agent, suitable for use with casting materials such as polyurethane and silicone. (Indsutrialplasters, n.d)) is applied all over, especially on the polyurethane areas as it does bond to itself. This means that the resin that will be poured on can bond and seal to the core, making it impossible to separate them.
Three layers of polyurethane resin was then poured over the sculpt, at 100g each. A brush was used to push the resin over the sculpt as it cured to make sure it didn't all just set at the bottom.
 |
| Figure 4 - Polyurethane resin (Brown, J. 2021) |
 |
| Figure 5 - Polyurethane resin (Brown, J. 2021) |
Two more layers were added with poly fibre mixed in, and this was applied around the sculpt and the core. Whilst the second layer was still wet, scrim was added as this gives more area for the plaster to grab onto later, which will stop them from coming apart.
 |
| Figure 6 - Layer of polyurethane with poly fibre (Brown, J. 2021) |
 |
| Figure 7 - Poly fibre layer with scrim (Brown, J. 2021) |
A wall is then made around each mould using foam board. It is secured to the board using hot glue and any gaps are sealed up. A batch of plaster is made for each one and poured over the top.
 |
| Figure 8 - Foam board walls (Brown, J. 2021) |
 |
| Figure 9 - Foam board walls (Brown, J. 2021) |
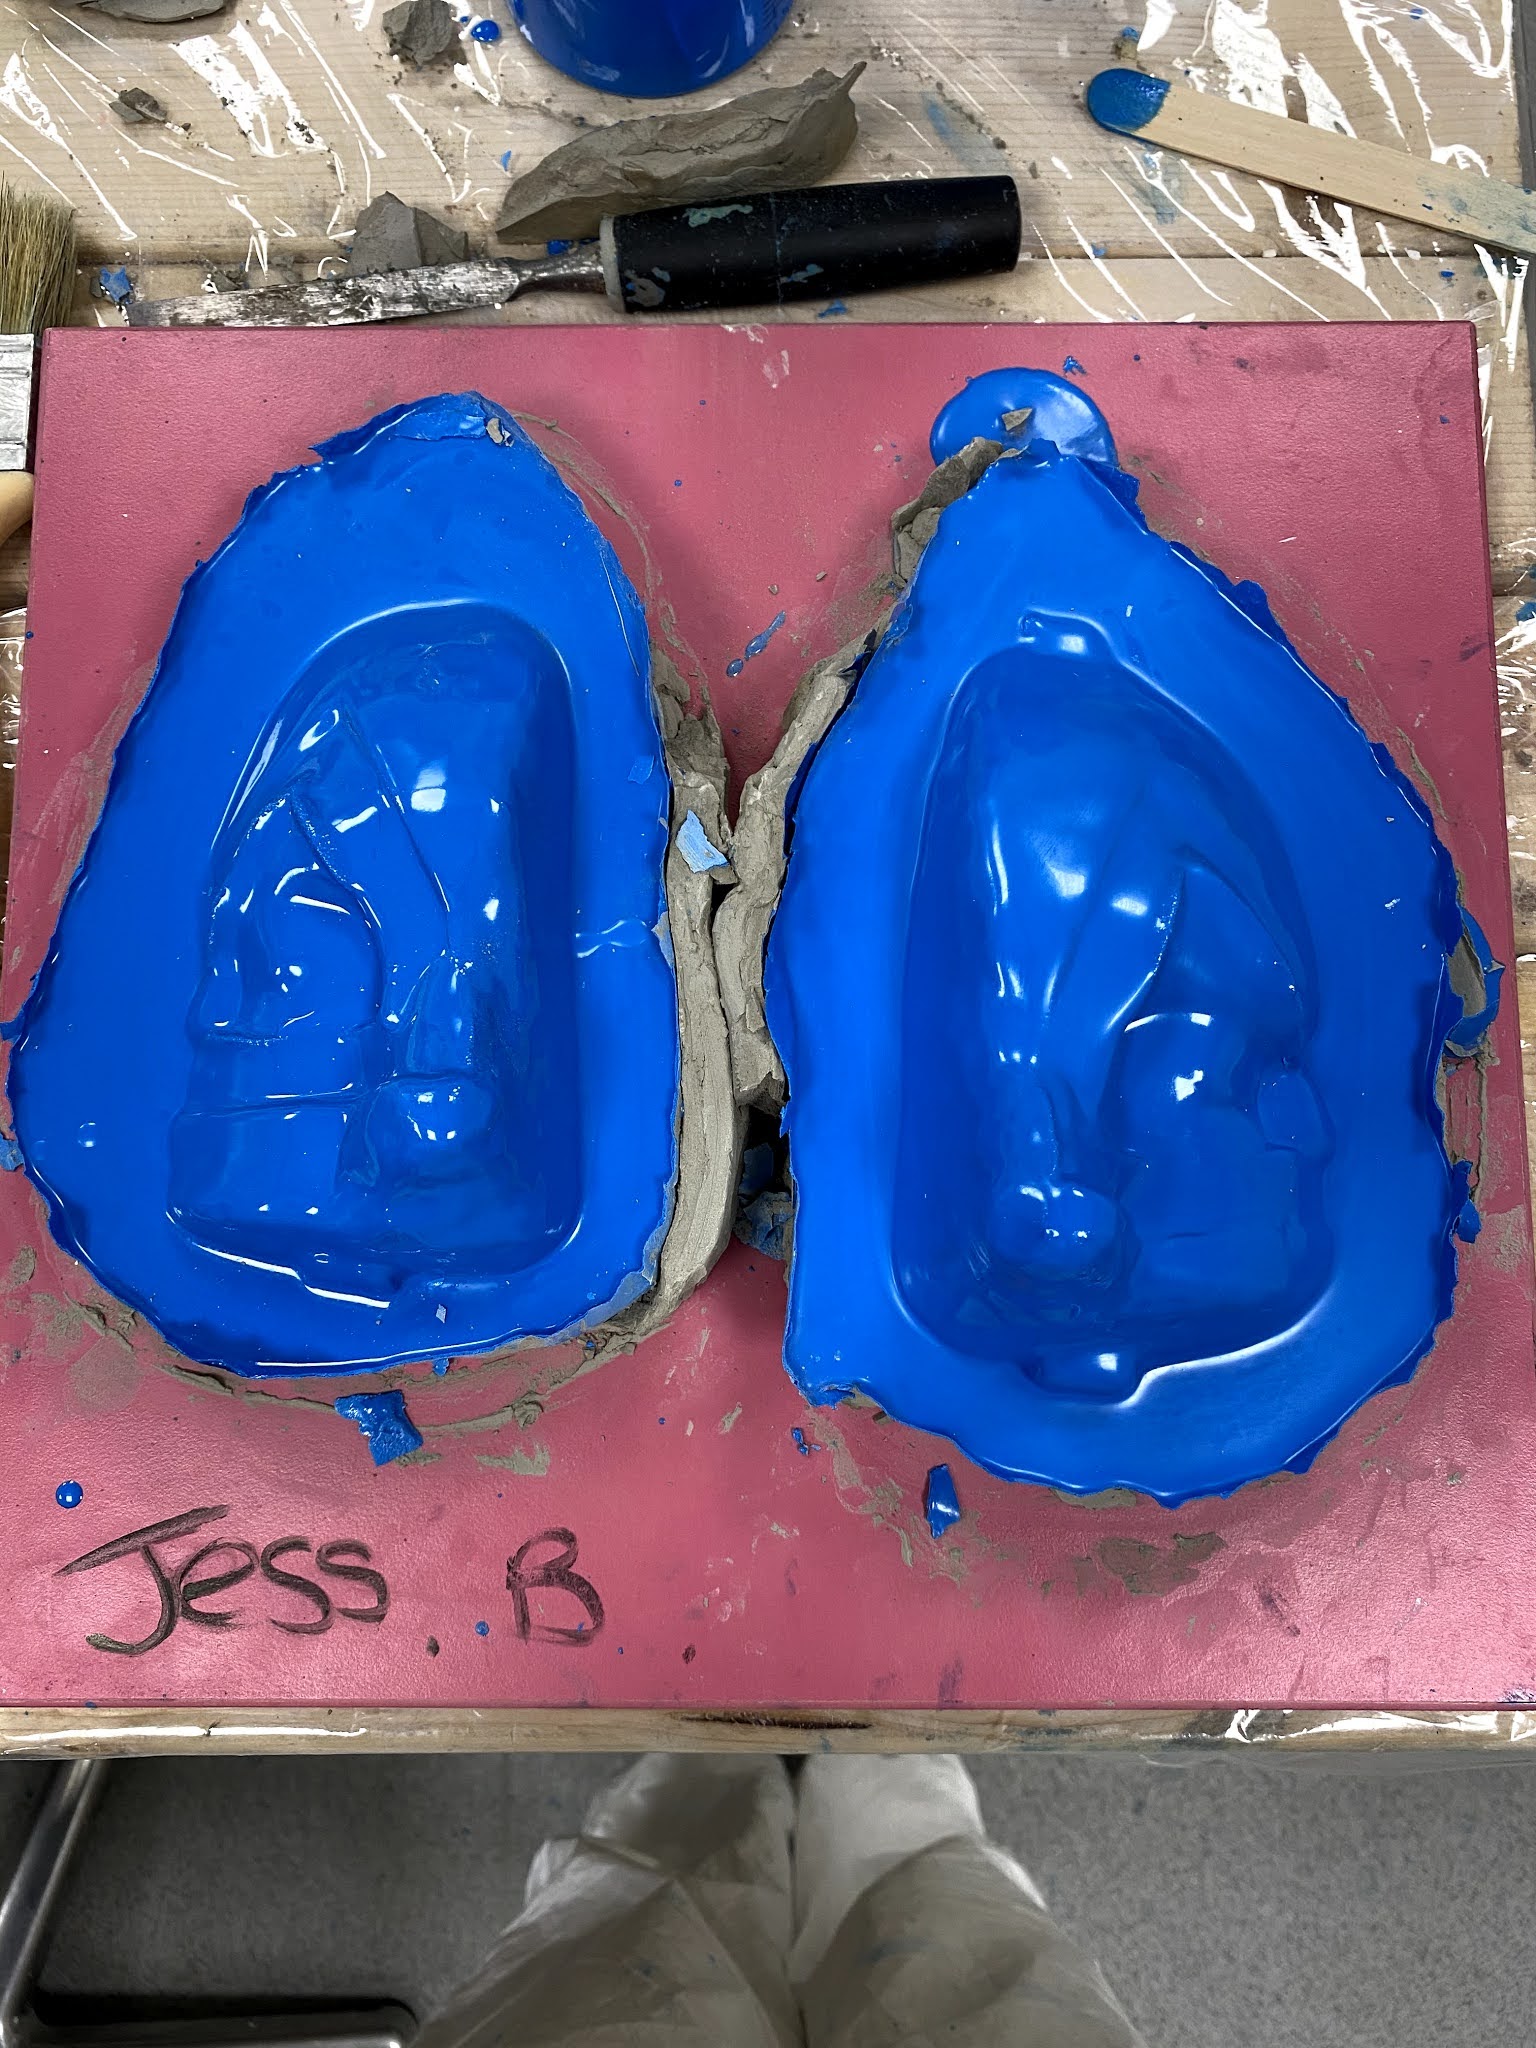
The snap mould is now finished. Once the plaster has set and the foam board removed, the two pieces can now be separated. This can end up being quite difficult as there can be a suction force inside, keeping them together. As long as enough release agent was applied, it will come apart. The use of multiple chisels and a rubber mallet were able to separate the pieces. This is why it is important to make sure the moat creating the walls is thick enough, as if they are too thin, this could have resulted in the mould breaking.
 |
| Figure 10 - Freshly released moulds (Brown, J. 2021) |
The clay and plasticine can be cleaned out using some wooden tools (as metal will scratch the polyurethane), a toothbrush and fairy washing up liquid, and some isopropyl alcohol can be used also. The mould is now ready for use. Keeping and measuring the clay of each sculpt can help to give an idea of how much silicone might be needed for each piece. In this case, the mouth was 20g, and each eye was 5g.
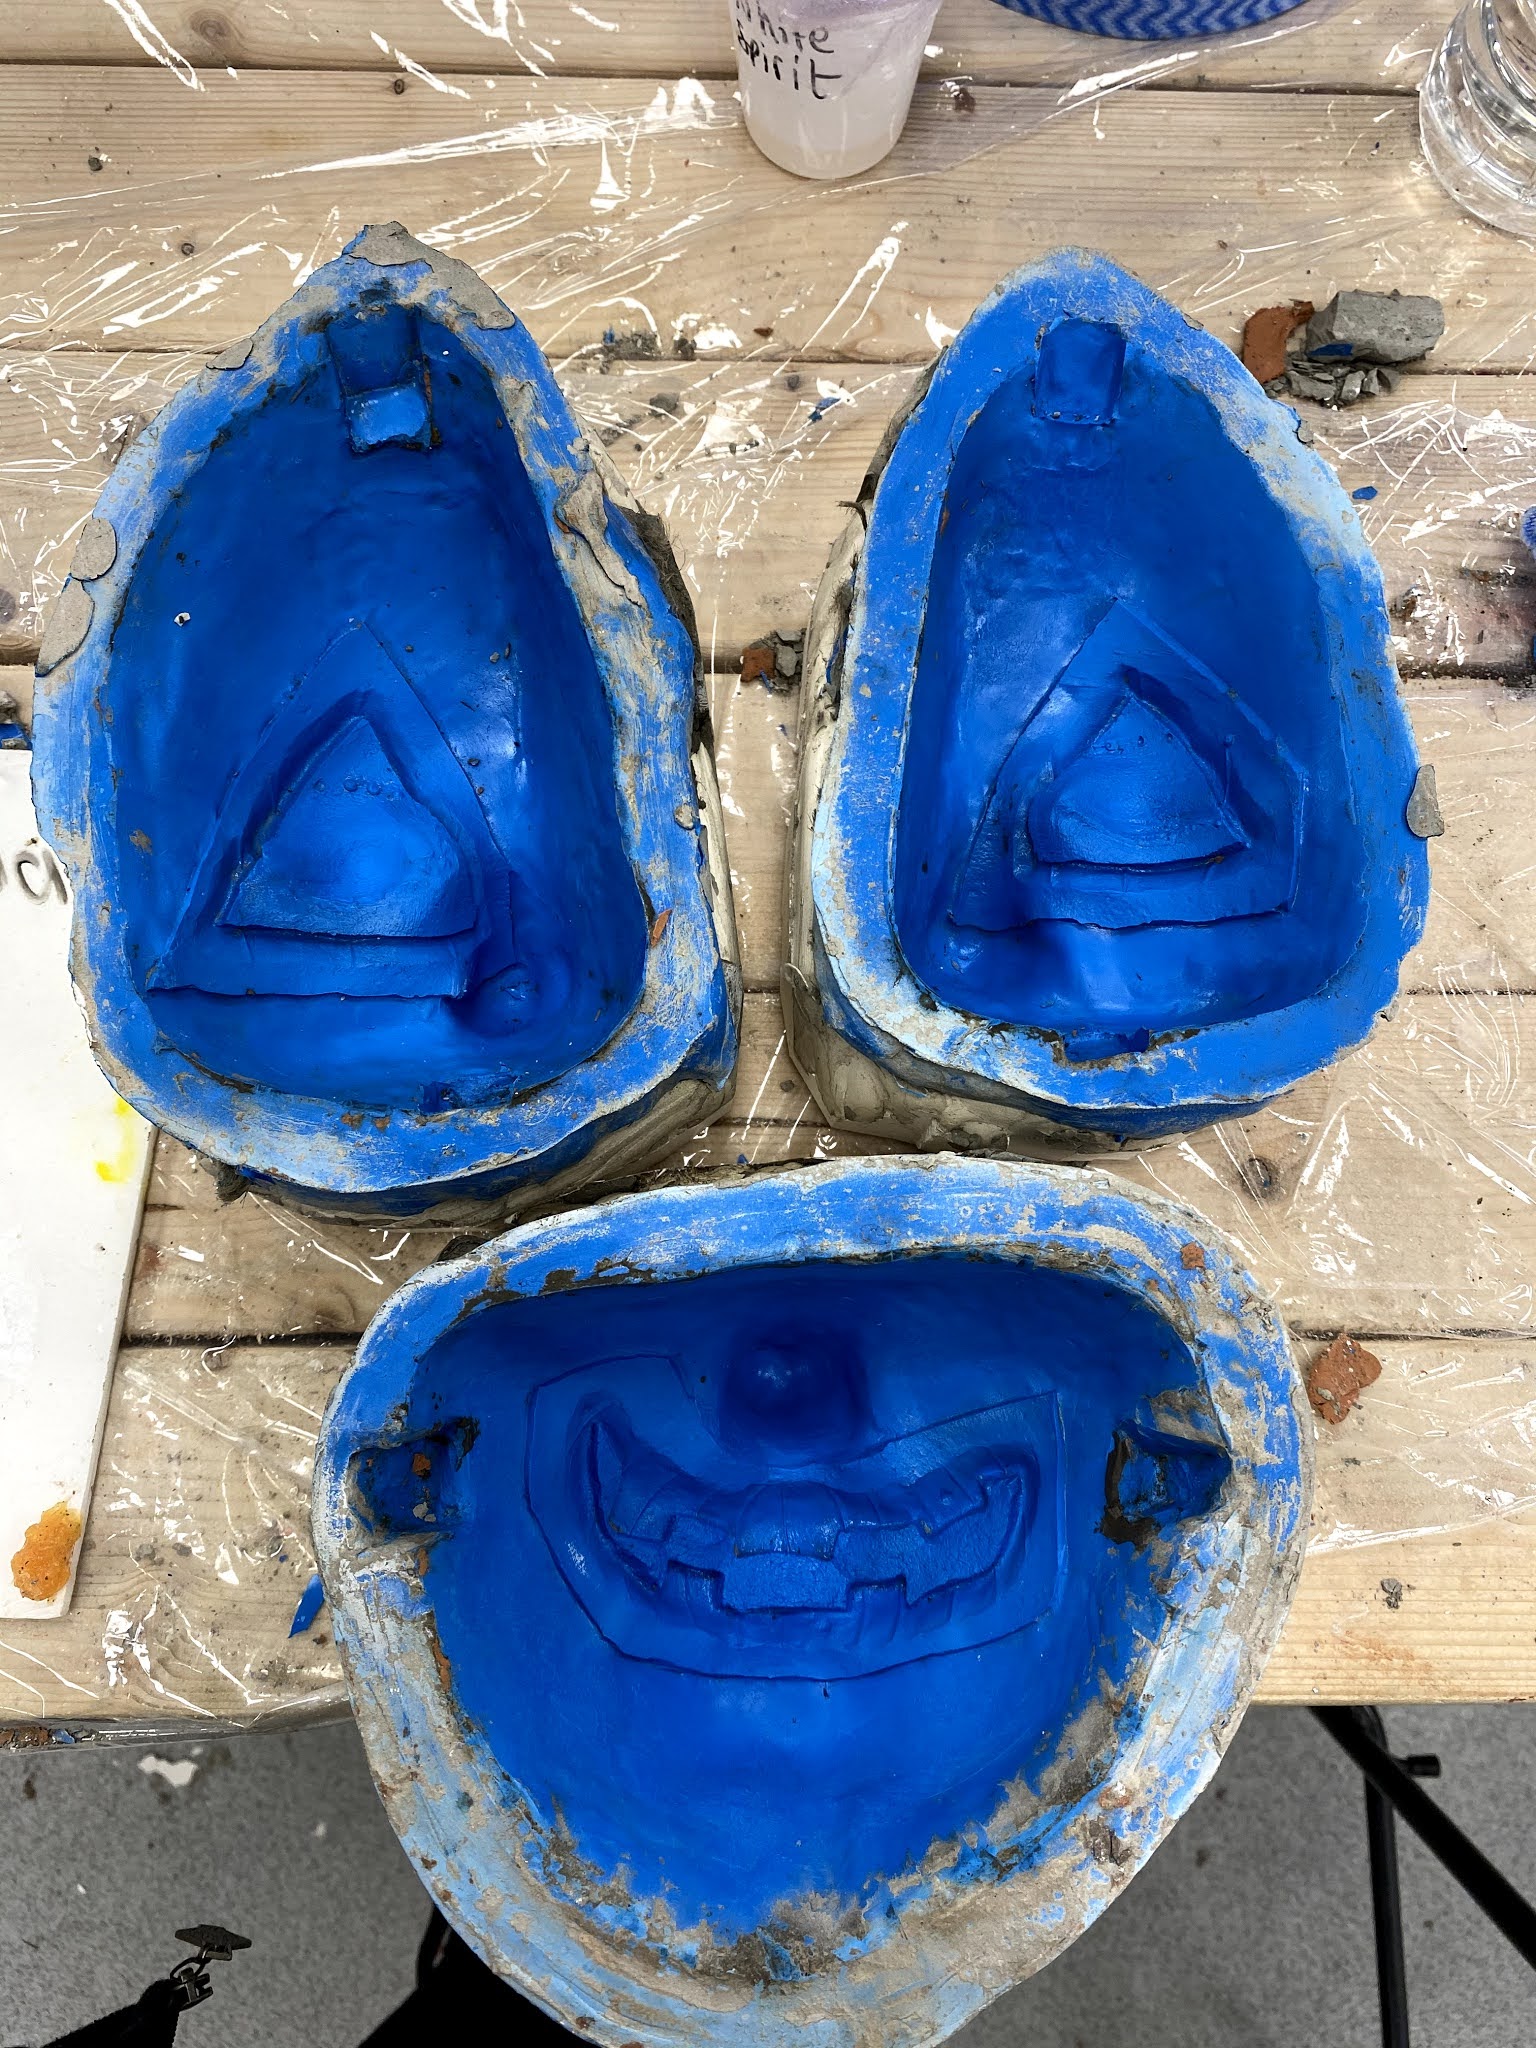 |
| Figure 11 - Cleaned out moulds (Brown, J. 2021) |
 |
| Figure 12 - Cleaned mould, right eye (Brown, J. 2021) |
 |
| Figure 13 - Cleaned mould, left eye (Brown, J. 2021) |
 |
| Figure 14 - Cleaned mould, mouth/lower face (Brown, J. 2021) |
It is important to check that the core fits well into the mould before running any silicone. Making sure nothing is catching or preventing the pieces from being squashed together fully. The keys and recessed keys did need a little sanding as they were catching, but after this was done, they fit together very well.
This was a very long process, however the student did enjoy doing it. It was quite worrisome to pour the resin over the sculpt as they were afraid they would ruin it or that they would become bonded together. However it did work out in the end. There wasn't a lot that they struggled with in this process. The clay was a lot neater compared to previous uses, showing some improvement. This definitely helped keep the mould neat and level.
-Jess
References:
- Debreceni, T. (2019) Special makeup effects for stage and screen: Making and applying prosthetics. 3rd ed. Abingdon, Routledge.
- Macwax Spray Release. (no date) Available from https://www.industrialplasters.com/prod/release-agents/macwax-spray-release-1. [Accessed 01/04/2021].
Bibliography:
- How to make a 2 part silicone mold using Mold Max 25. (no date) Available from https://www.smooth-on.com/tutorials/mold-max-25-create-2-silicone-mold/ [Accessed 01/04/2021].
Figures:
- Figure 1, 2, 3, 4, 5, 6, 7, 8, 9, 10, 11, 12, 13, 14 - Brown, J. (2021) York College.
Comments
Post a Comment